So making this simple A500 fast RAM expansion wasn’t too hard, and it reminded me that I had been meaning to make up one of the simple A500 IDE interfaces that have been around forever. There is this John Tsiombikas one that uses a bunch of simple AND, NAND and NOT gates, and this other MKL one called a500ide that uses a 74HCT688 and some NAND gates. I actually have the PCBs for both of these but have never made either up. But I was looking at the schematics a bit more closely and realised they are basically exactly the same, except one uses a 74HCT688 to address decode 0xdaXXXX, and the other uses lots of AND and NOT gates to decode 0xdaXXXX. They both use the same ide.device driver. For all intents and purposes the IDE interfaces is effectively wired straight onto the 68000 bus. Given my fast RAM expansion has most of the signals already present, I thought maybe I could hack the IDE interface onto the same protoboard.
Of course I’d have to address decode 0xdaXXXX to maintain compatibility with the ide.device driver, but I already had some address decoding via the 74LS138. It had chip selects for the first eight 1MB blocks of the Amiga’s address space. The first two are not usable. The 3rd one is used by my 1MB of static RAM, but the other 5 aren’t really used. So the idea was to take the 8th one; the 0x700000 chip select (p7 of the LS138) and use that for the IDE interface instead of 0xdaXXXX. That would mean I’d never be able to expand fast memory beyond 5MB .. but I am pretty sure I won’t be adding more than 4MB on this board. By using the 0x700000 chip select I only need to add one 74LS00 to the board to make it all work.
Using 0x700000 as the address of the IDE drive meant that I’d need to change the ide.device driver. I could set up a compiler environment and recompile the ide.device driver OR I could be really cheap and just hexedit all the references to 0xda in the binary of the driver. So that’s what I did. I did disassemble it first, and there is one or two spots where 0xda occurs as part of a BSR or some other instruction, but it’s only 7K in size so its easy to mod ( Here is my modded ide.device)
So here is the fast RAM board with the 74LS00 and the IDE connector.
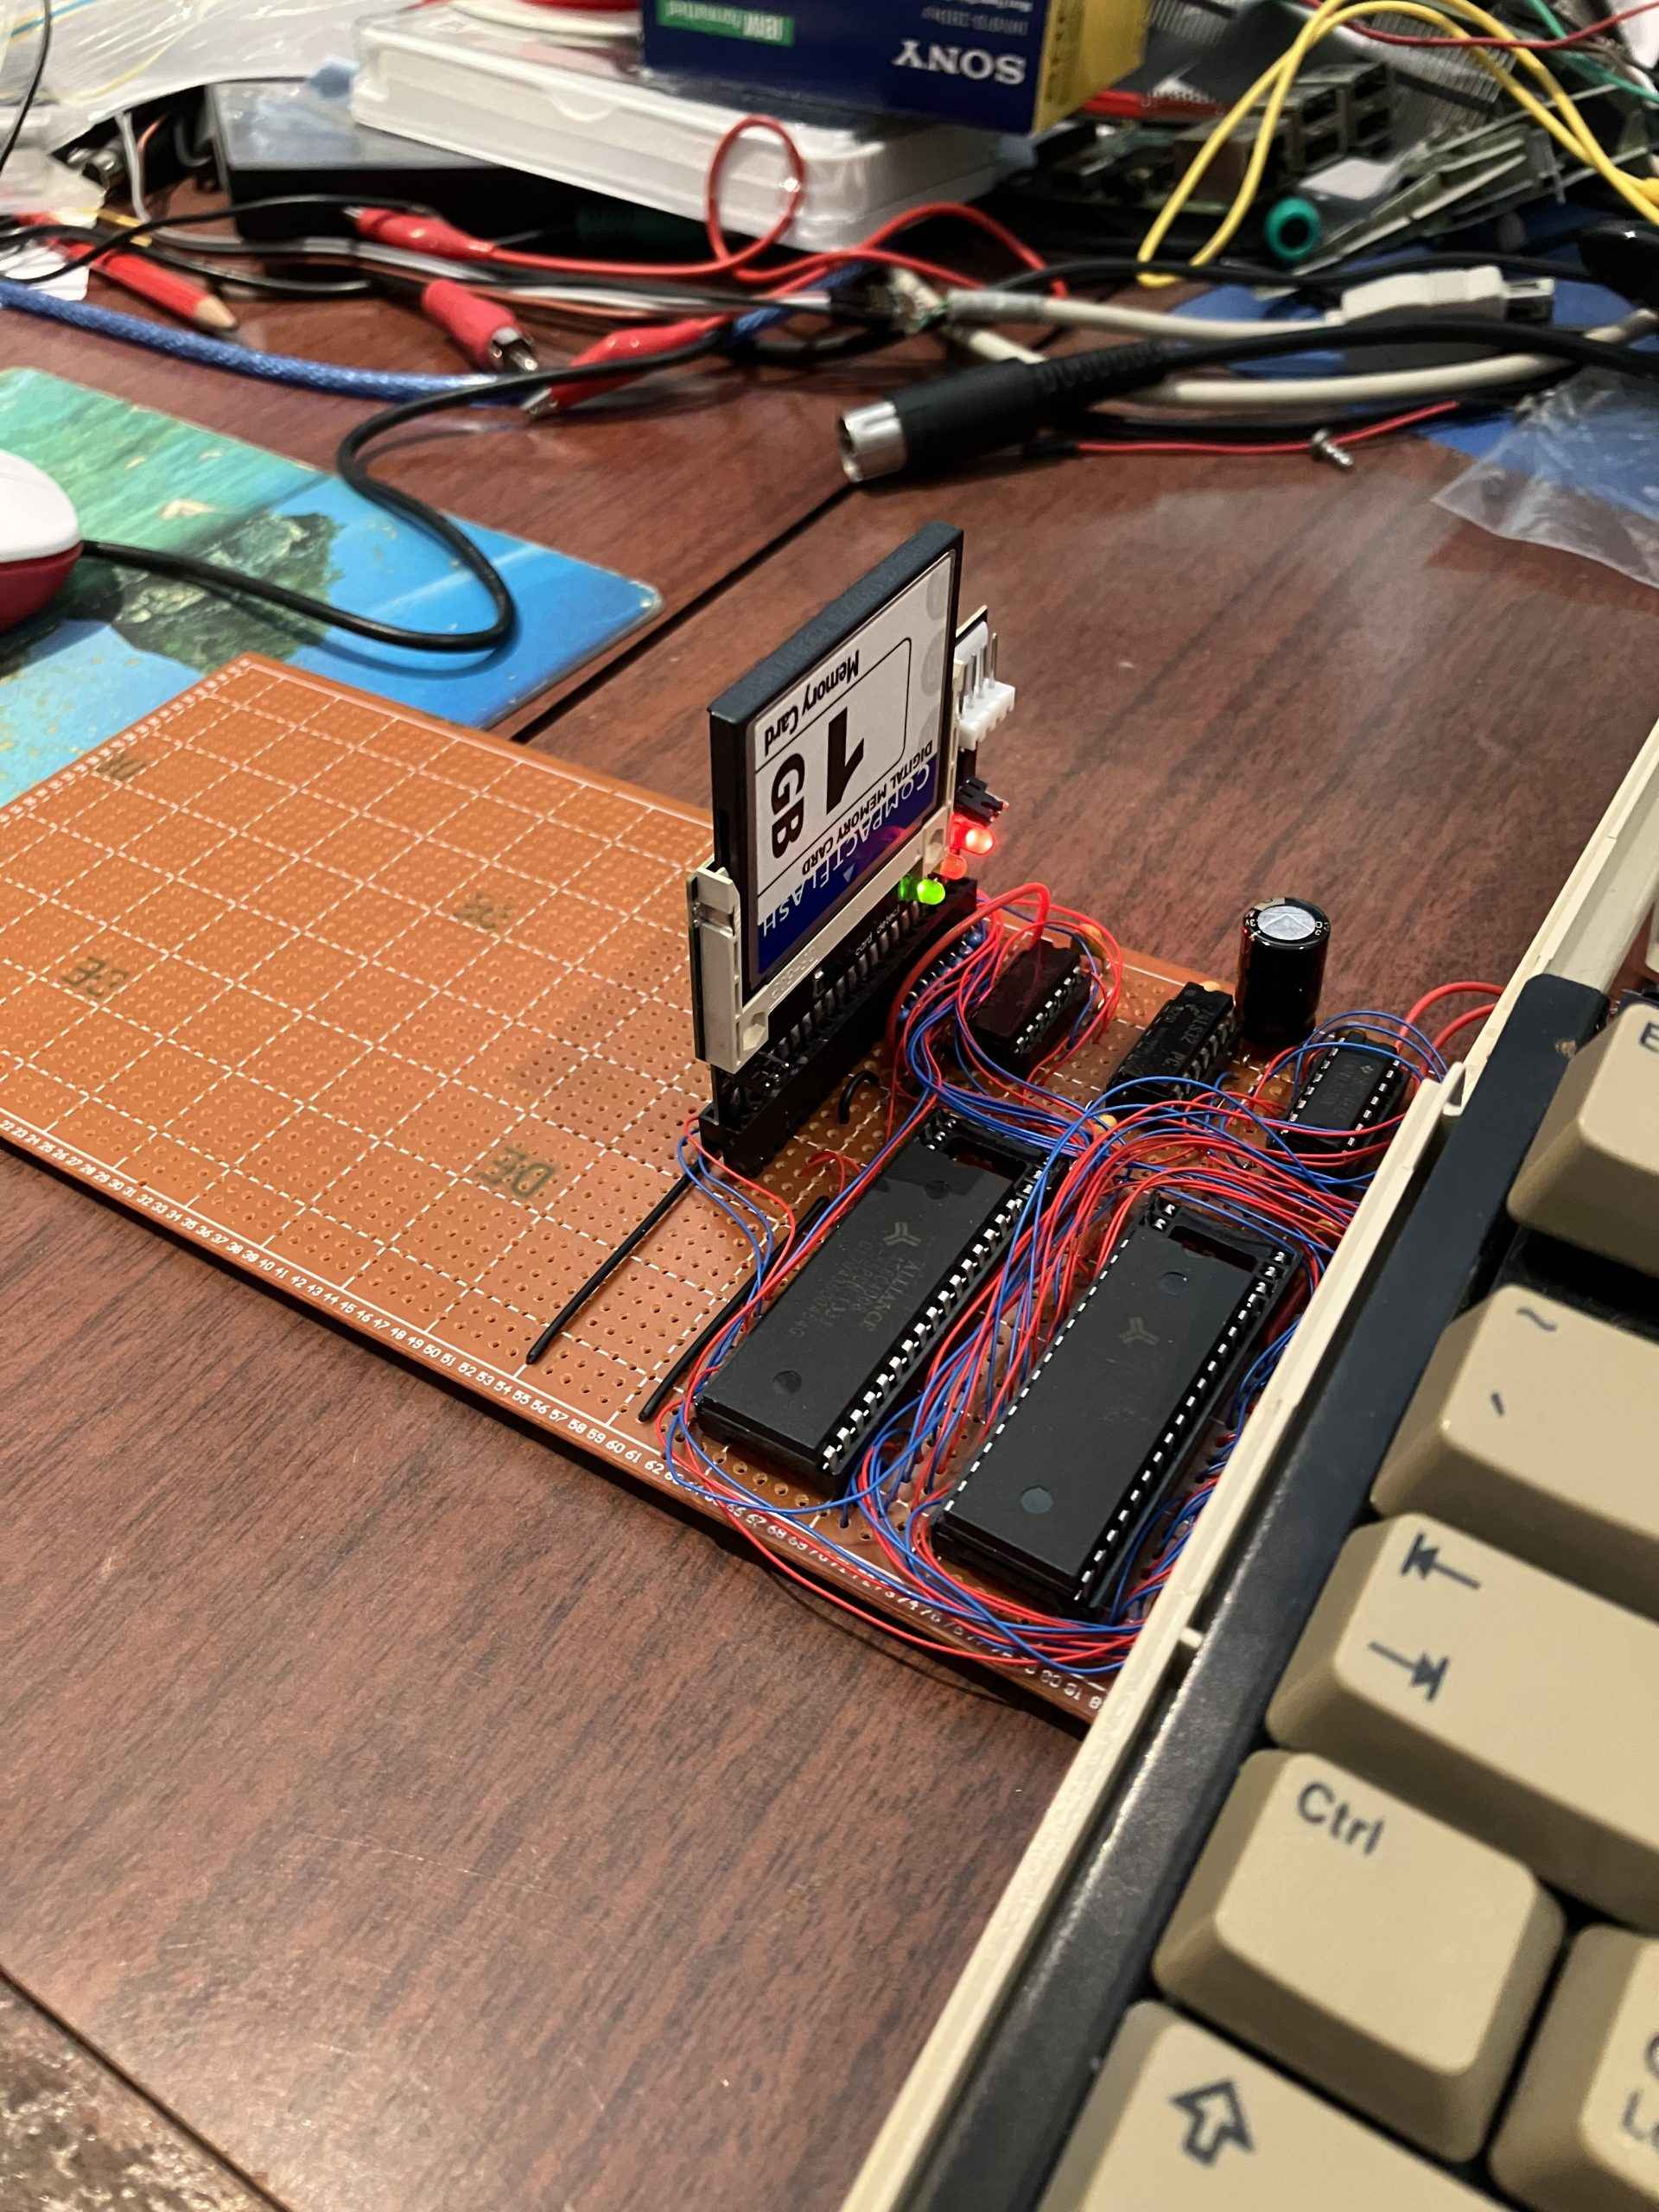
Originally I plugged a ‘real’ 8GB IDE drive into it to test, but I’ve now put in a cheap 1GB Compact Flash card with adapter (you have to remember to run +5V to the ‘Key’ pin of the 40 pin IDE connector to use these types of adapters).
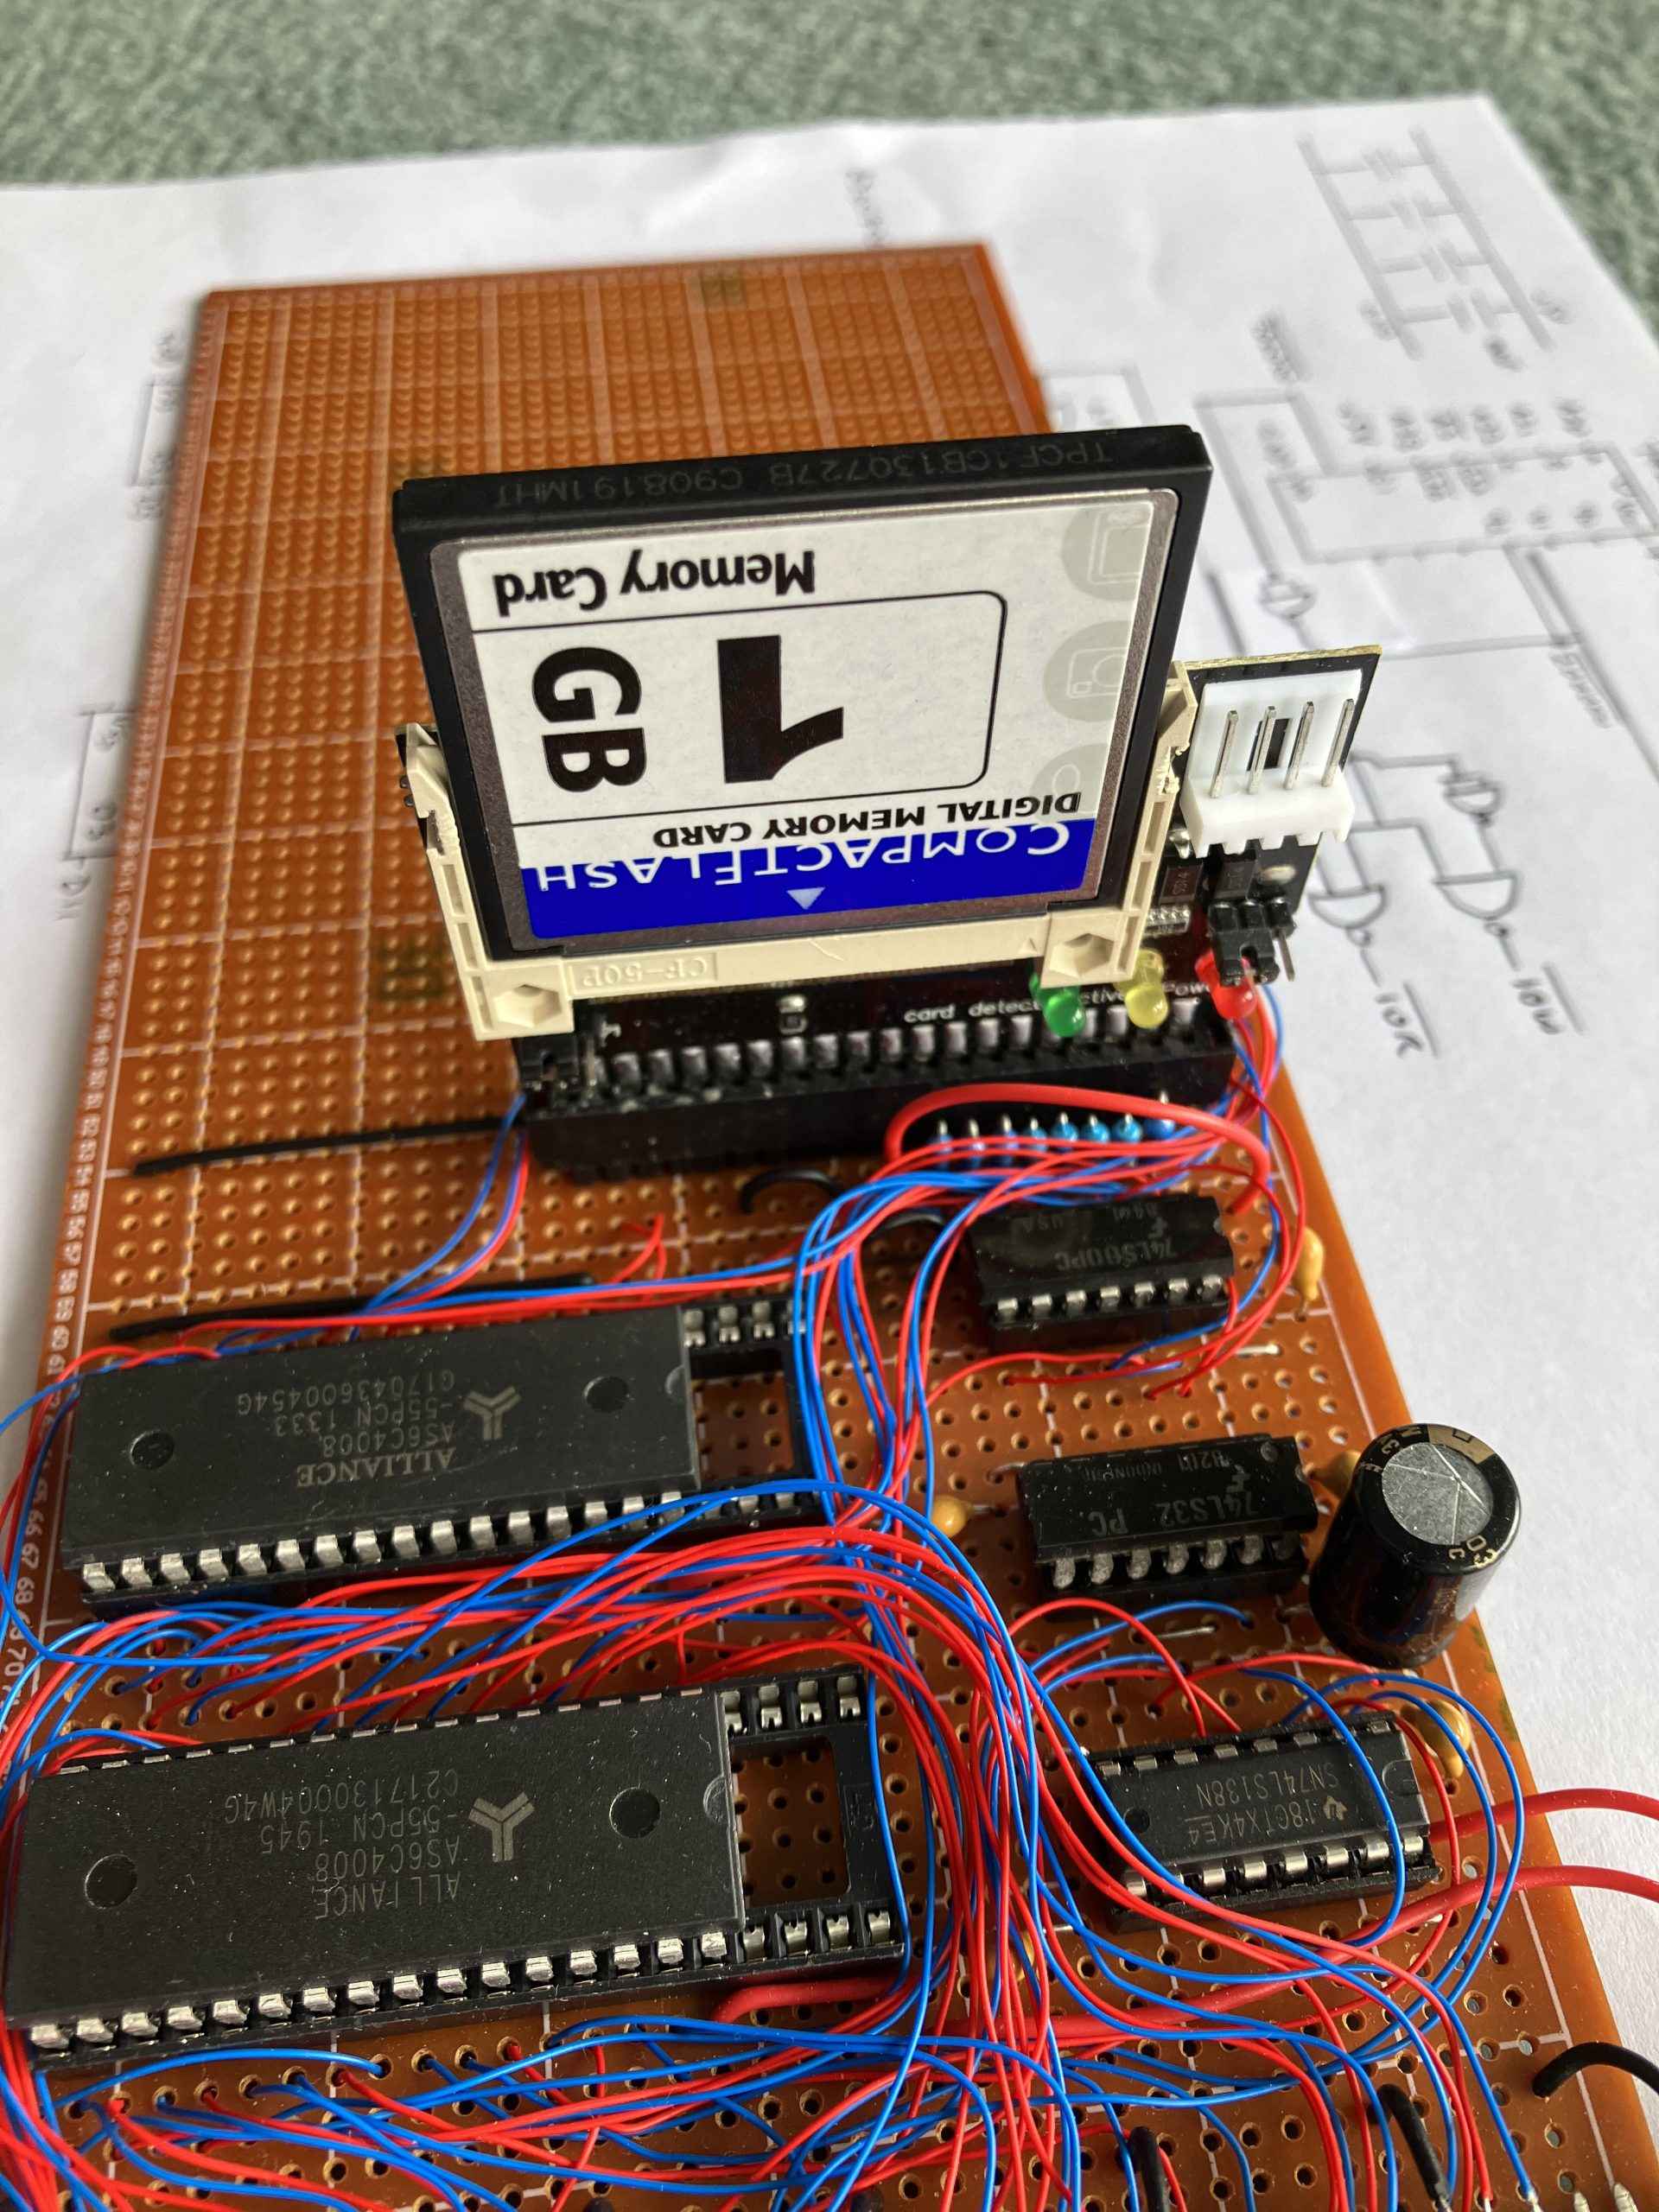
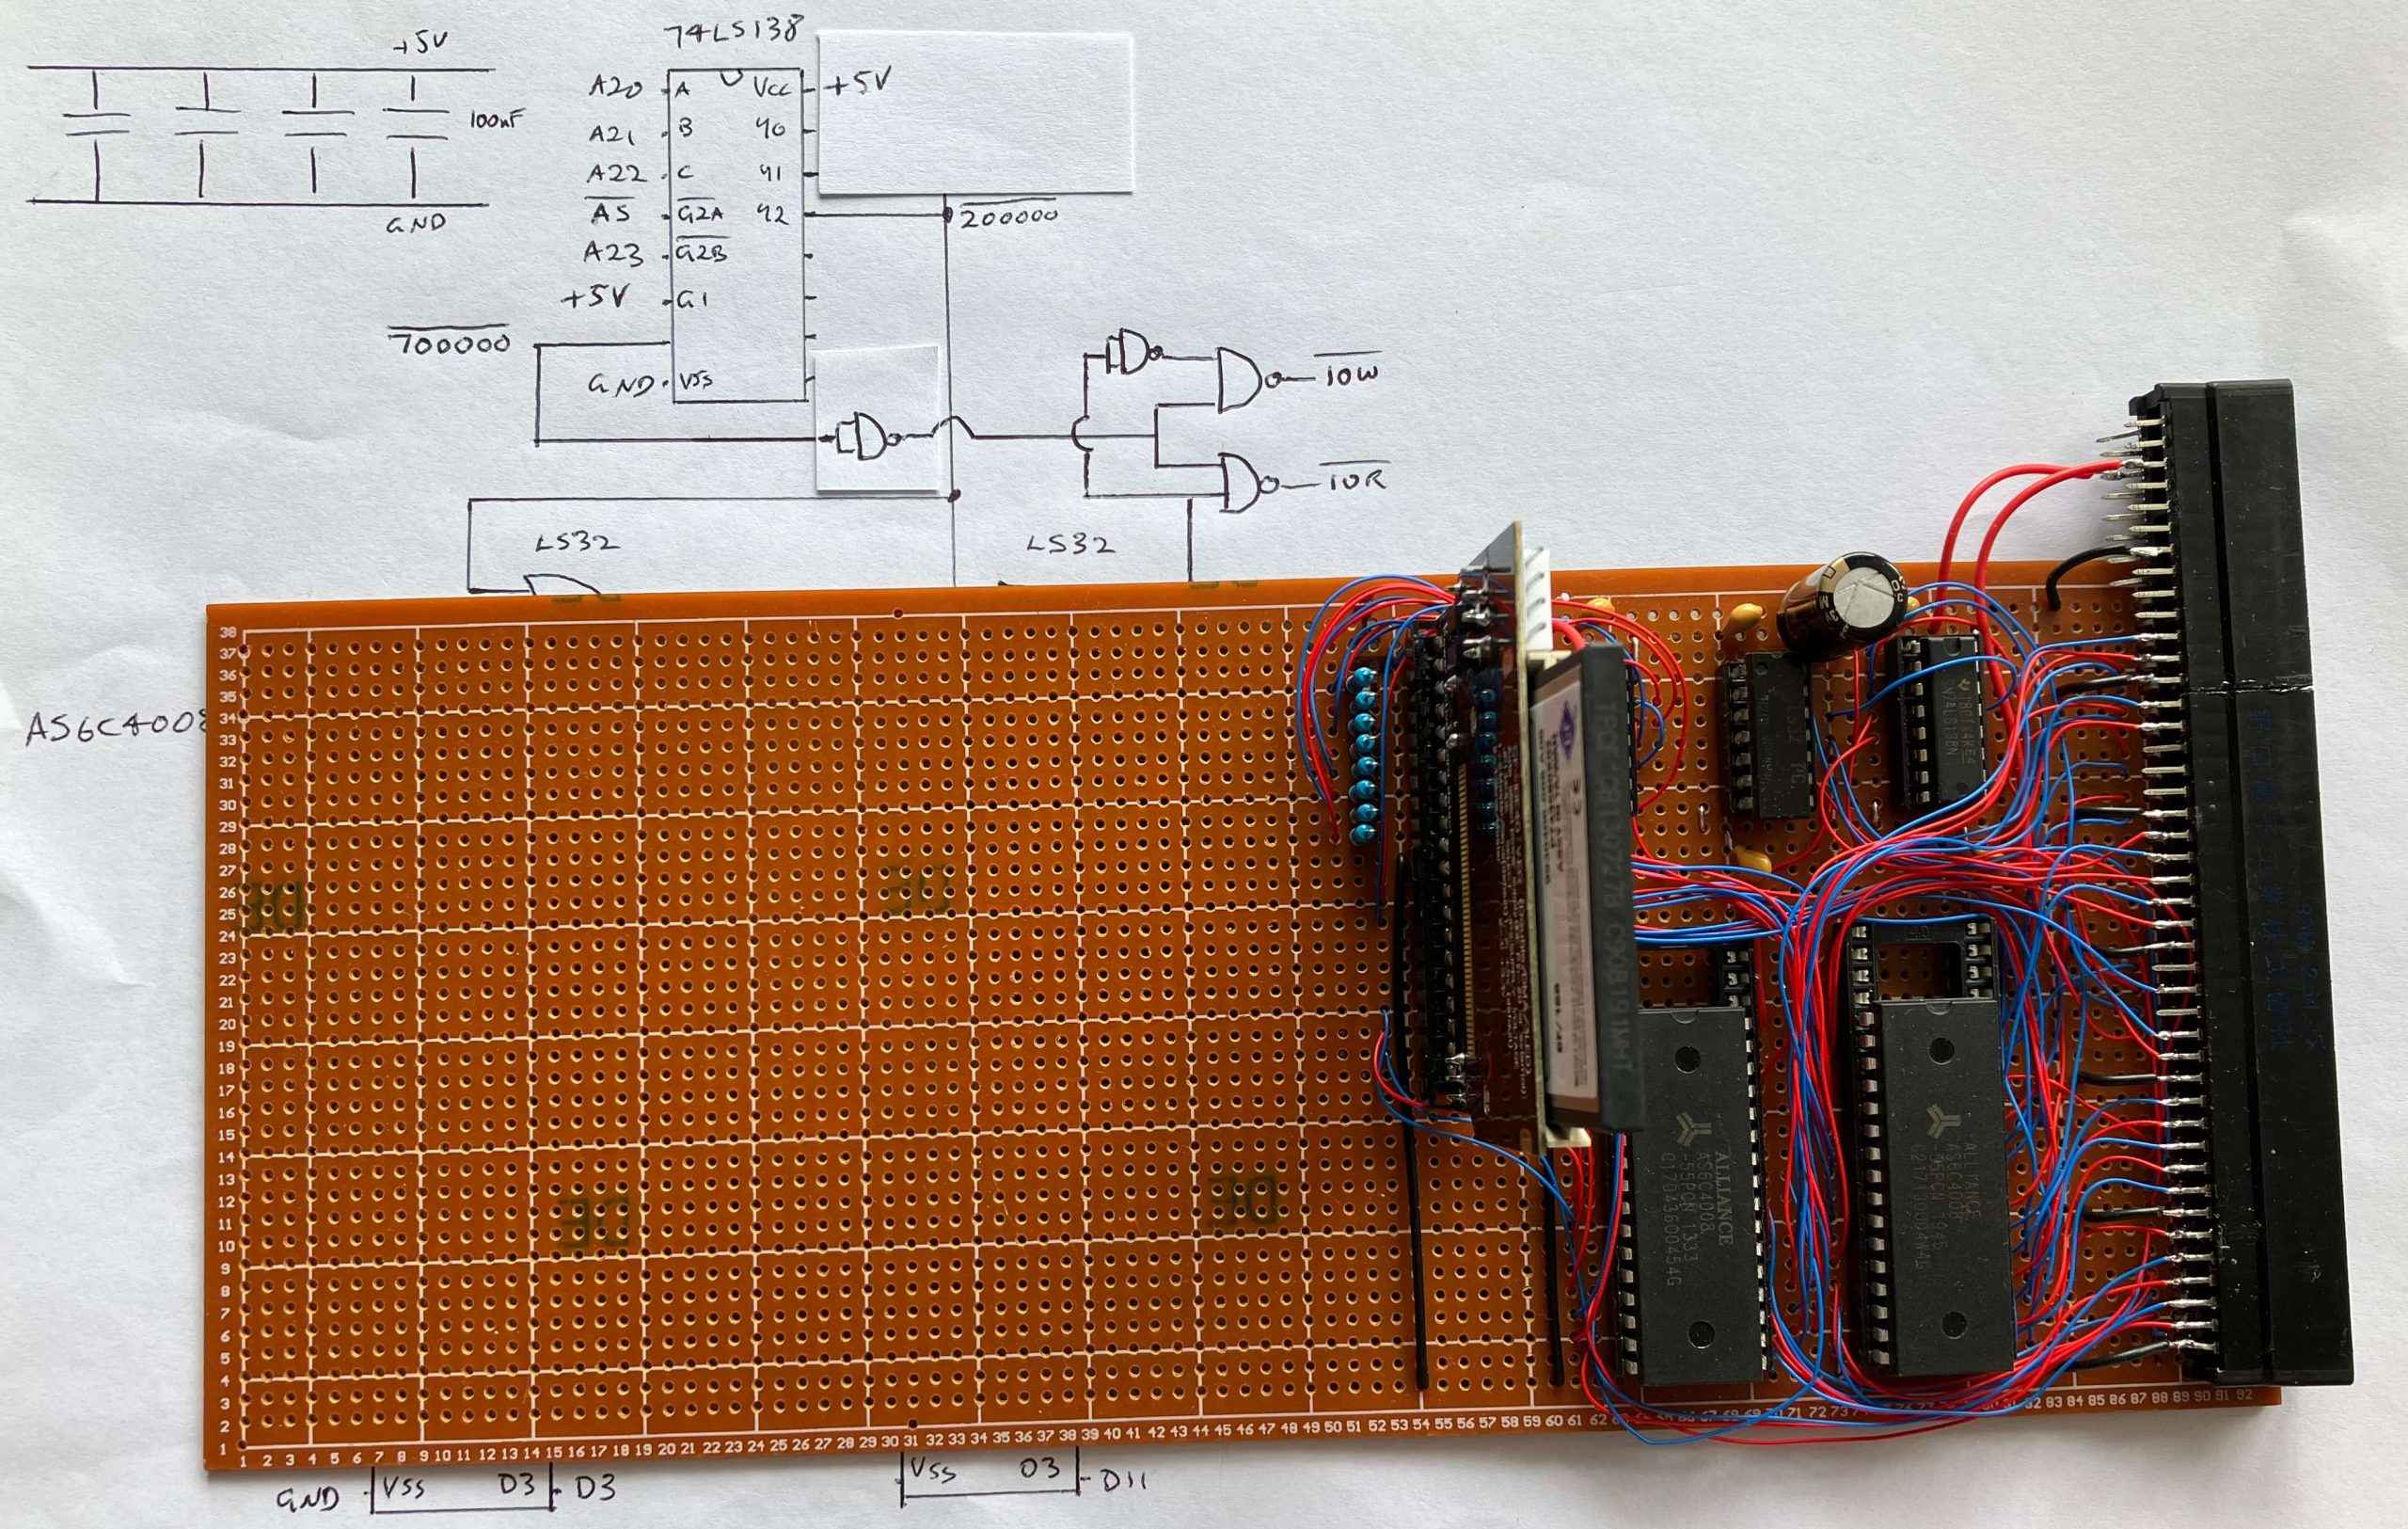
And here is the wiring detail primarily showing the 74LS00 gates that will drive the _IOW and _IOR pins of the IDE connector. I added the large electrolytic shown in the photos later. It’s just a 1800uF across +5 and GND.
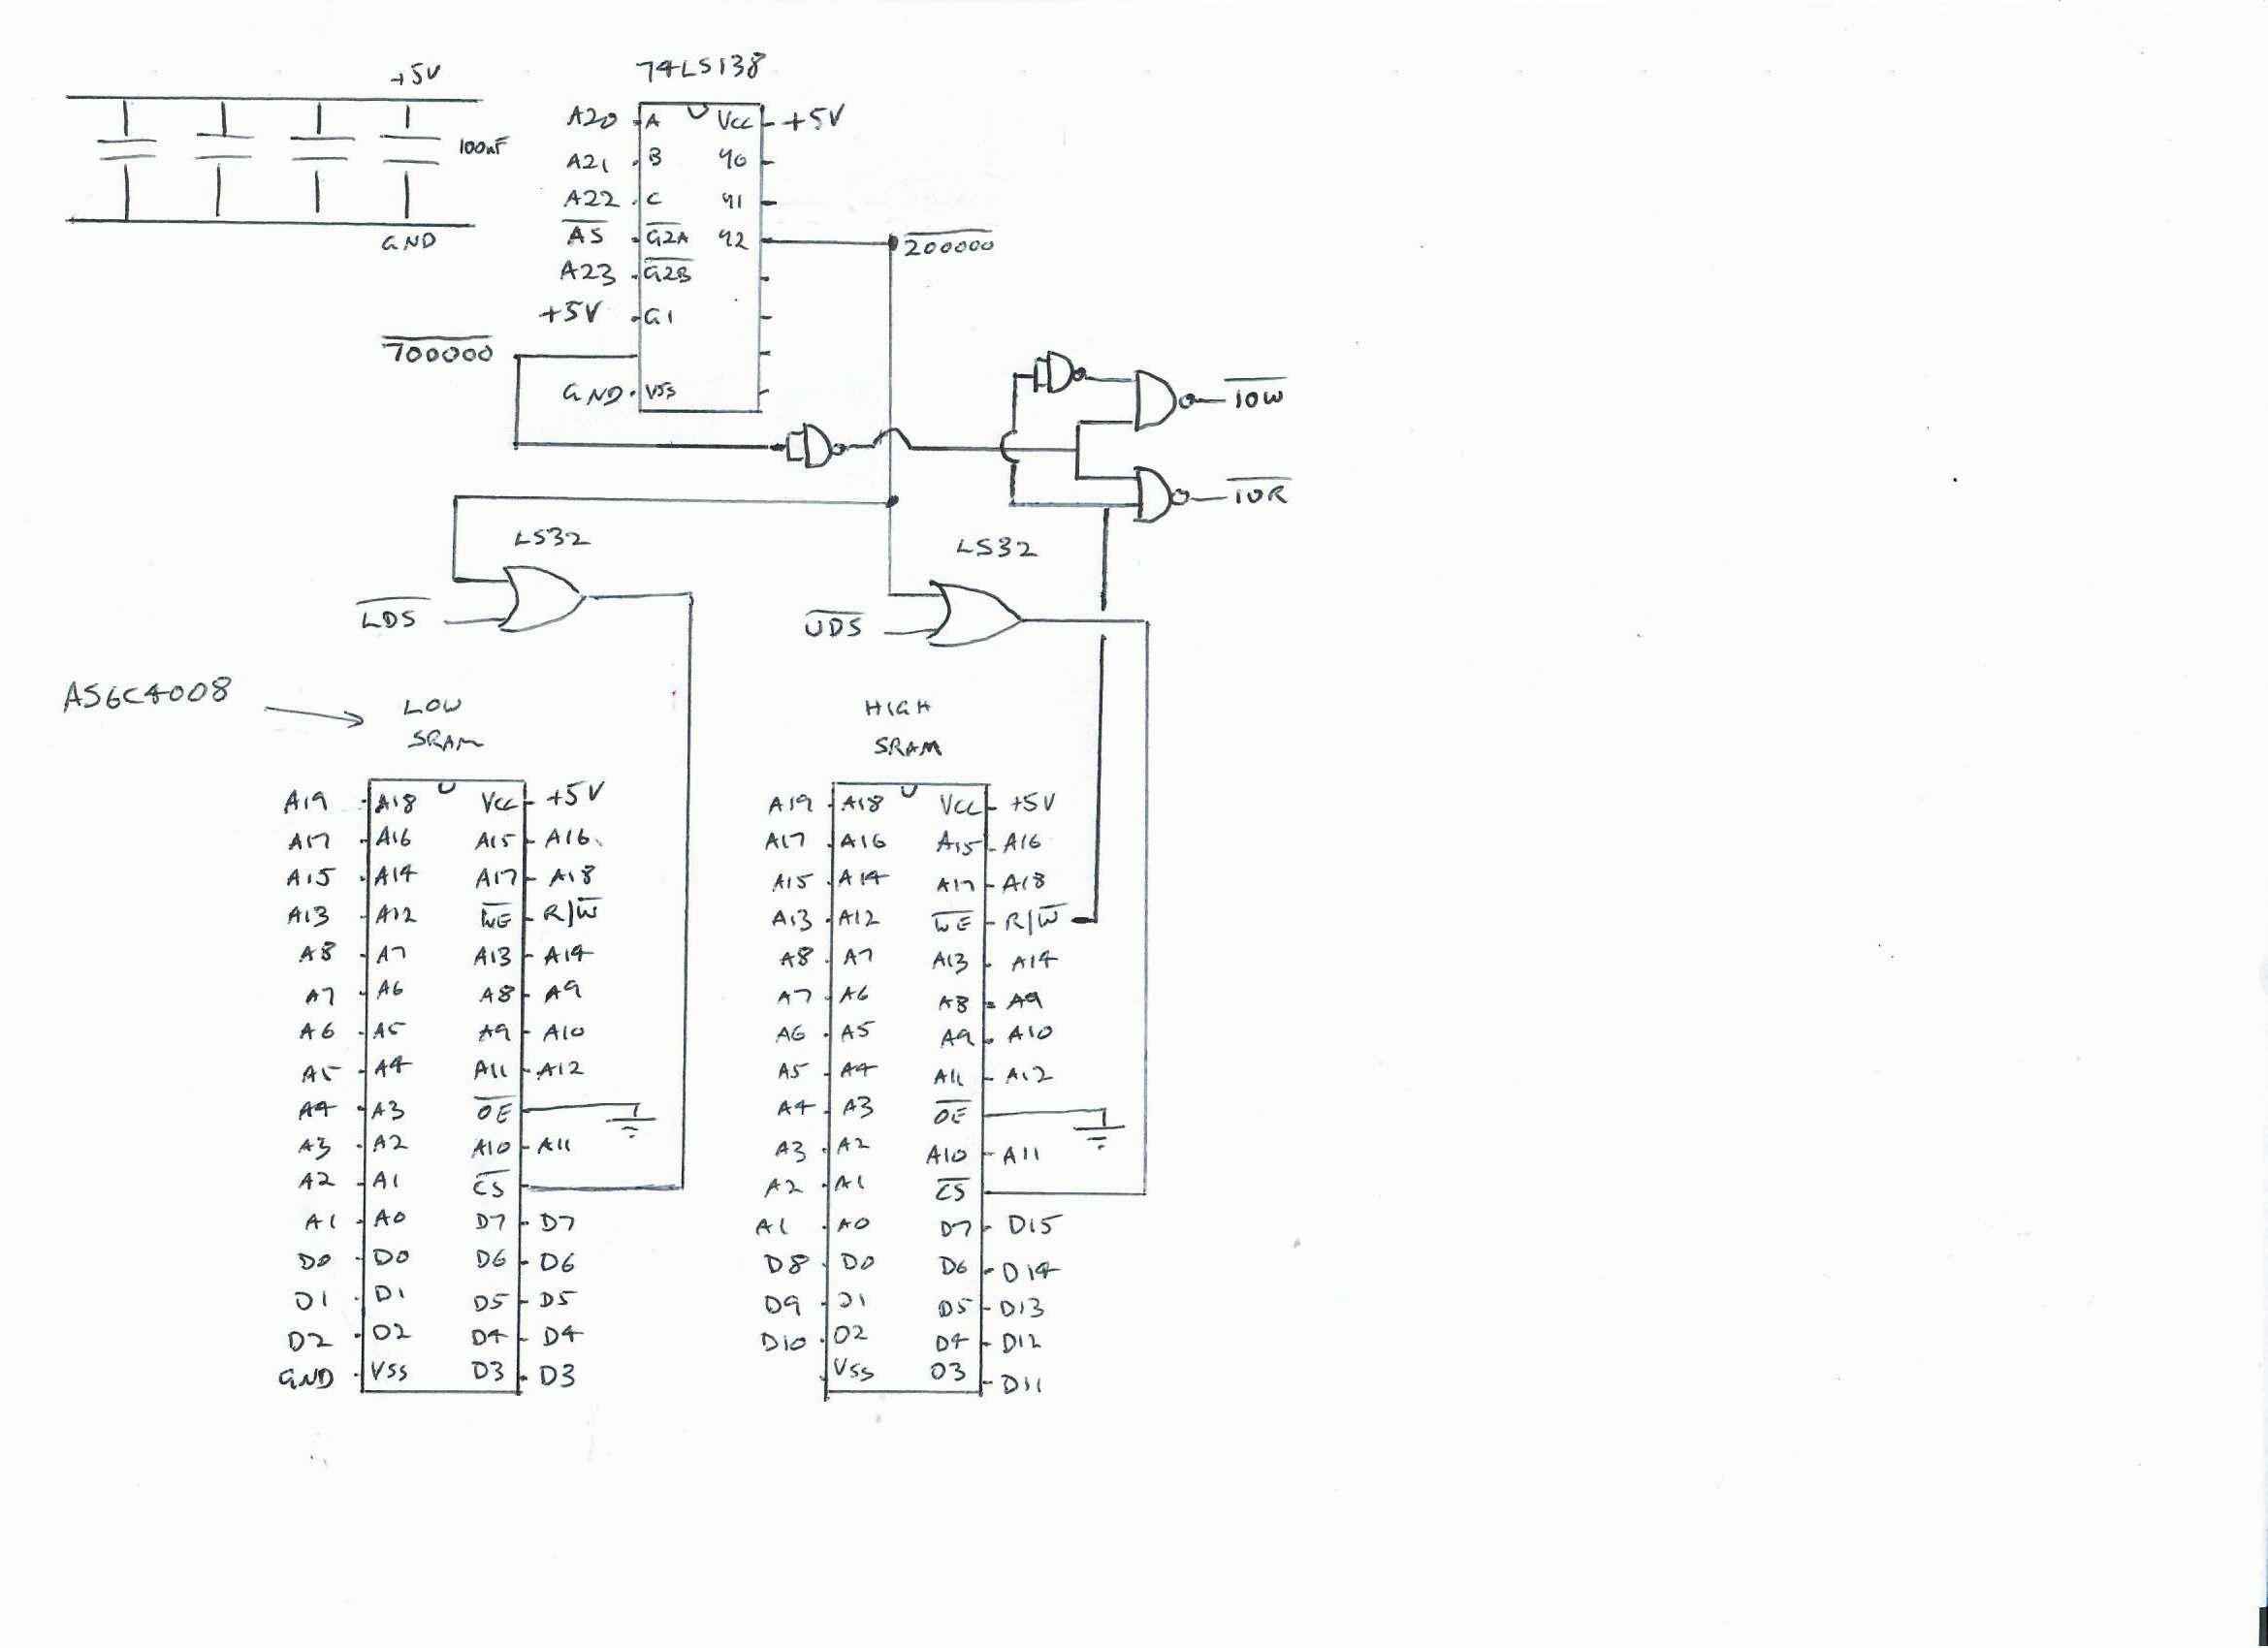
Again, if you look at the John Tsiombikas one there is a very clear schematic showing all the main connections from the 68000 side. I’ve opted to use the 68 ohm resistors on the data bus just like his design, but I’ve chosen to have no activity LED (the CF card adapter has one anyway).
For my own reference, I took this approach to install Workbench
- Put the Compact Flash card in a USB adapter and attach it to a linux computer running fs-uae. I then configured fs-uae-launcher to pass through the ‘device’ for the CF card so it appeared as a hard drive. On linux you’ll probably want to sudo chmod 666 the device file (and my linux setup does not automount anything). I then booted the ‘Disk 1’ of Workbench 3.1, updated the ‘Information’ on HDToolBox to use uaehf.device (there are plenty of howtos online showing you how to do this), and then ran HDToolBox. It detected the CF card.
- But when I ran “Change Drive Type” .. “Read Configuration” it always returned with ‘SCSI Inquiry not supported’ or some such.
- I then created a real Workbench 3.1 disk 1 with the modded ide.device in it’s devs: directory.
- I put the CF card into the Fast RAM/IDE expansion and booted off the floppy on the Amiga 500.
- I updated the Information for HDToolBox to “ide.device” and ran HDToolBox.
- HDToolBox detects the drive as ‘address 0 , unit 0’ , but it will then try to detect ‘address 0, unit 1’, and it takes a very long time to work out there is no 2nd drive. I didn’t count, but it’s a good 10 to 15 mins of nothing much happening.
- Eventually HDToolBox starts and “Change Drive Type” .. “Read Configuration” does not show the SCSI Inquiry error. This time it generally succeeds. It spits out some warning that I can’t remember. But it was able to pick up heads and cylinders etc (I am using a cheap generic 1GB card). At this stage I could follow similar howtos online to partition the drive (I picked DH0: = 125MB, DH1: = 125MB and DH2: the rest). Make sure you note down the original heads and cylinders for the drive and the start/end cylinders for each partition.
- I wanted to use pfs3 with the CF card, but I didn’t have a disk handy with the driver on it, so I just saved the partition stuff with the default FastFileSystem for now.
- Shut down the Amiga, and put the CF card back in the USB adapter and boot fs-uae off the Workbench 3.1 DIsk 1. Mod the HDToolBox information to uaehf.device (though it might already be that from the previous boot).
- Run HDToolBox in fs-uae and it should see the drive and the partitions now.
- I usually have a local folder virtual ‘Hard drive; in fs-uae called localhd: I put the pfs3aio driver binary in the root of that virtual drive.
- I then generally looked at this howto about how to load the pfs3aio driver and format the disks (In my case DH0: DH1: and DH2:). In my case when you enter the path to the custom device driver, I put localhd:pfs3aio
- Follow the steps to install Workbench 3.1 to DH0:
- Now it’s a case of setting up a boot floppy (for 3.1) that has the modded ide.device and a mountlist that will work for the parititoning scheme I created earlier. I won’t go into this here. Have a look at ‘Formatting and IDE drive for us in an Amiga 500‘ . That is a good starting point for what you need to do (even though it’s for Workbench 1.3).
- Put the CF card into the fast RAM/IDE interface board
- Boot the boot floppy in the Amiga 500 . In my case I use the ASK command to ask me if I want to try to mount DH0: or drop to a shell. Then I ASK if its for sdbox or IDE. Then essentially it’s a bunch of assign commands and then you execute the s:startup-sequence on the DH0: drive.
- Next I’ll install lha, Installer and WHDLoad, and copy in a bunch of folders with games. It’s easier to do all that under fs-uae.
- Also get AutoAddRAM and copy the executable to c: and the memorylist.aar to s: . You need to edit the memorylist.aar so that it just has one line for the 200000 2ffffe range (ie. my 1MB of fast RAM)